This post may contain affiliate links.
This is a detailed and fool-proof recipe for roti-making. The post deals with techniques of roti / chapati making. See, you don't need a recipe for soft roti. There isn't one. The secret is not in the recipe but in the technique. So once you know the technique, you'll figure out a recipe good for your sort of flour and weather.
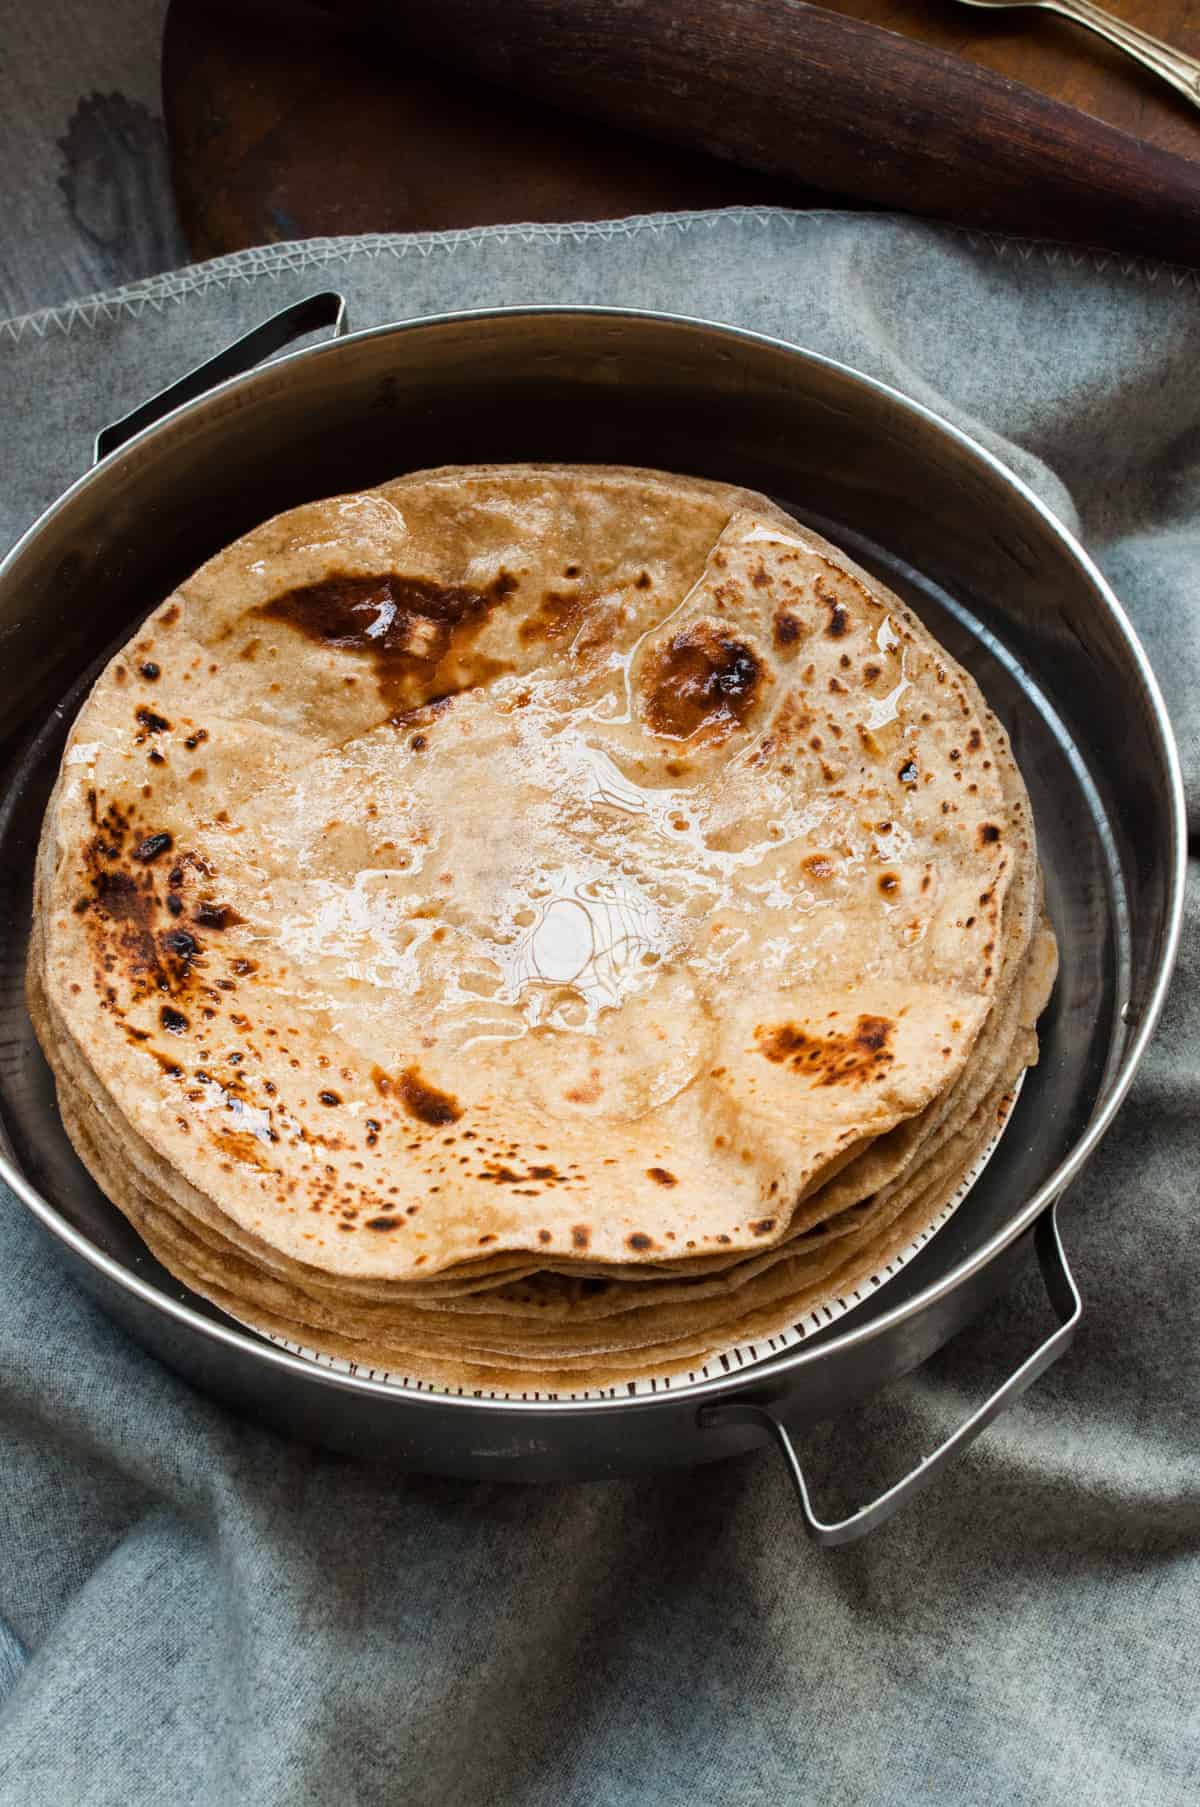
14 + Secret tips
- The science behind soft roti making: Making soft chapati requires some patience. The trick is to make the gluten (a type of protein) in whole wheat flour make a matrix that will hold its structure and fill the air in the dough. This is attained by kneading, then resting, and again some final kneading. Kneading also makes the dough soft and pliable so making roti/chapati becomes even easier as the dough is not sticky or too soft to handle. You actually enjoy making roti as if playing with playdough.
- Wheat Flour: Flour is the main ingredient. Use good quality, fresh, and finely ground flour. Consider testing a bit until to settle for a brand. Here's a post that shares some useful information about atta.
- Grease board or counter and rolling pin: This is simple but crucial. A little greasing at the beginning of roti-making can make a non-stick-like surface that also protects your wooden board and rolling pin. And roti sticking problem can be overcome.
- Always knead dough in warm water: This is the most important tip. You need to rest your dough for 15-20 minutes but if you knead your dough with warm water, just 5-7 minutes resting is good enough.
- 2-minutes of kneading is enough: Seriously, who's got the energy to knead the dough for 5- 10 minutes long. I know women with tennis elbow, shoulder, and neck injuries; they certainly find it too strenuous. Just mix the flour and water until you have a crumbly mix and bring them together gently, that's it. Leave it for a few minutes then gently knead for a minute or two. Warm water helps here too. Although, no harm in kneading for as long as you like.
- Rest the dough for soft roti: Don't go straight away making roti. I know, we all are in a hurry when the clock is ticking and kids are hungry. But 5-7 minutes resting can make a big difference and rested dough is pliable too. It gives you that perfect command. And you don't find roti-making so overwhelming.
- Make a pliable dough: That's important. Check the dough after resting don't just start making segments or roti portions. If it's hard add a little water and make it soft. If it is too sticky, add a little flour and knead again.
- Perfect portions: See, you won't get those perfect circles that'll impress your mother-in-law until you make perfect round portions. (Oh! I know how hubby suddenly starts missing amma's food(mother-in-law) seeing shapeless crispy rotis.) So, a little attention here if you care for the shape.
- Not too thin or thick: We all feel the thinnest roti is perfect. That's not true. Thinnest is driest. It will quickly give away moisture. Make roti that is not too thin and of course, even not too thick.
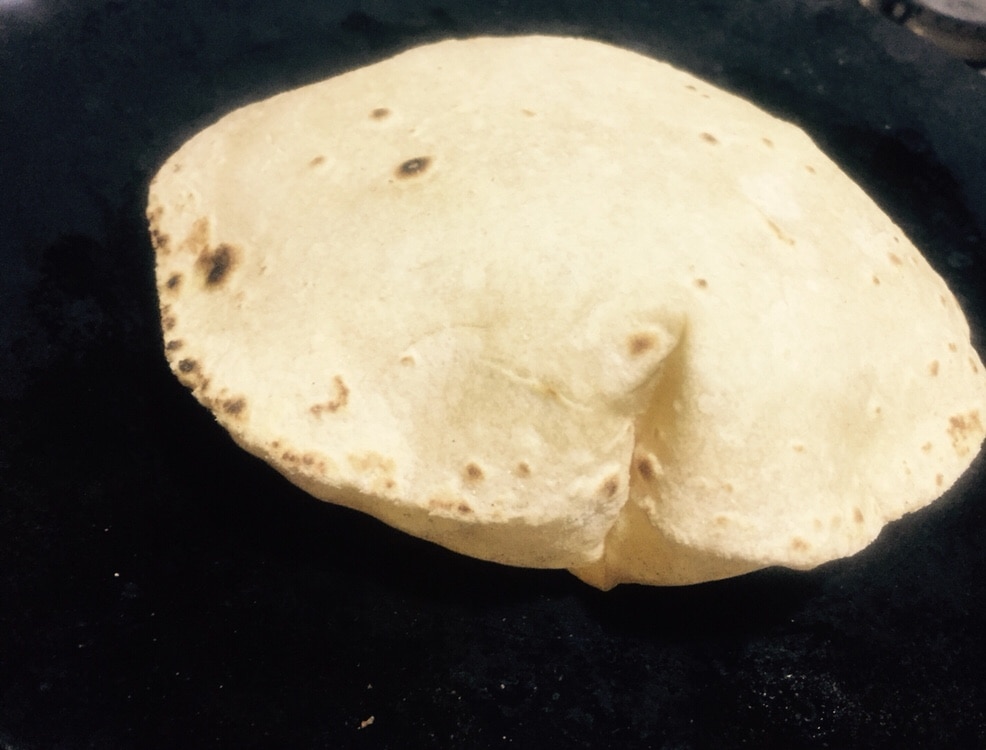
- A little flour is good: We all feel too much flour dries out the roti, that's true. But, if your dough is soft then you can use a little flour to dust that will avoid sticking and you can easily shape perfect circles.
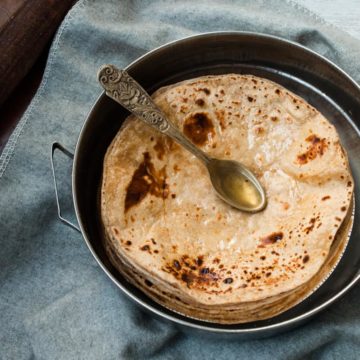
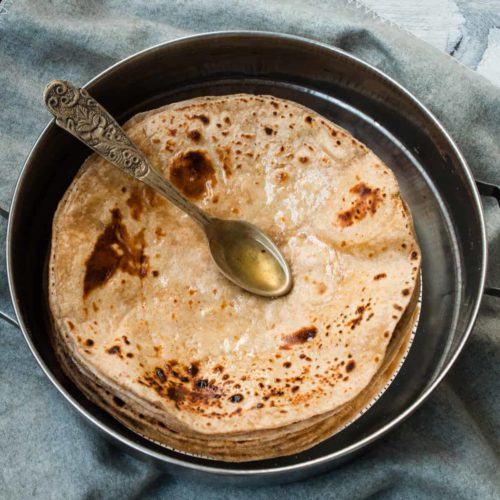
- Roti Storing tips: Always store hot rotis in a hot pot or any container with a lid so roti doesn't get dry. Fresh Roti releases lots of moisture upon cooling. All moisture gathers on top of your hot pot or container and then drips from the sides. This condensed liquid gathers on the base. So roti on the base gets wet. To avoid this, people use cloth or paper. Paper sticks to the roti and if it is newspaper; naturally the last roti goes wasted. And if you use cloth, washing a sticky cloth every two or three days is a hassle.
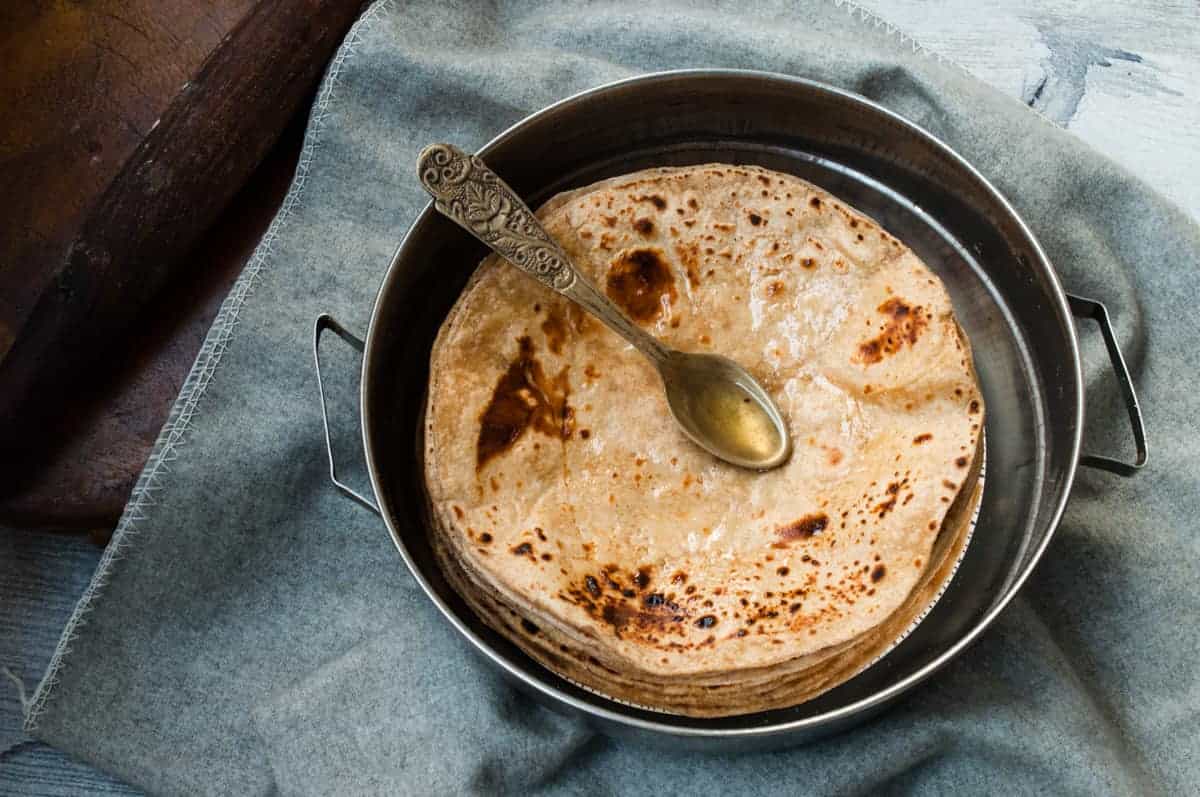
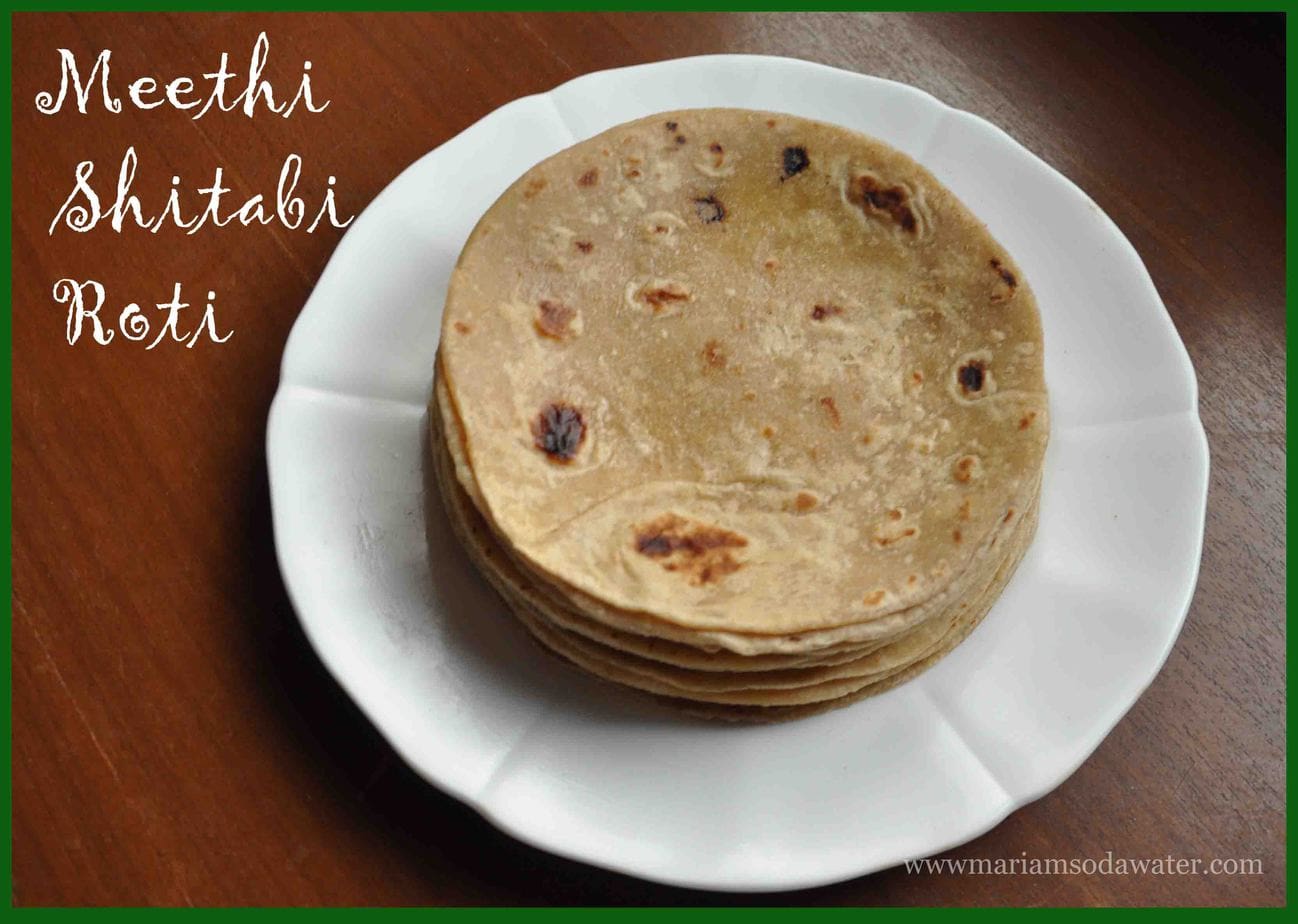
- The solution is to place the pile of roti on a plate the size of roti and keep roti along with the plate in a container or hot pot. All water will drain under the plate, the problem is solved to an extent. Look at the plate in the above picture and give it try. This is million dollar tip.
- While making fresh roti while eating can be very tasty but tiresome. I recommend making it 2-3 hours ahead and reheating lightly can make it a lot easier and more practical. If storing roti for more than 3 hours store in the fridge to keep it fresh.
- Wipe off everything tidily: This doesn't have to do with softness. But, we know how tidiness is as tied with being ladylike as soft round roti. This tip will also send away that insect that loves flour and greasiness. Wipe off the board, rolling pin, counter, and everything with a dry cloth so there are no loose flour particles clinging anywhere.
- Roti re-heating tips: Never reheat the chapati on a too-hot griddle. Heat on medium heat slowly one by one and you'll have good soft roti even after a few hours. If the chapati is dry, sprinkle little water on both sides. A non-stick pan or tawa is handy over here as chapati can stick to the iron tawa. Also, apply little oil that'll retain moisture in the roti. With a little care, you can eat those leftovers.
- Leftover roti also makes an amazing snack: Just shallow sprinkle some salt and pepper on the surface and fry roti with very little oil until crispy. These popadums like roti make a quick breakfast with cream and jam.
- Dry weather care: Especially in winter weather is very dry so making roti a little care can solve the problem. If making more than 10 roti, divide the dough into two halves and make a segment of only one half. When 10 roti is ready, make segments from the remaining dough. This will save dough from drying quickly. Also, cover the dough with a cloth while resting.
- You can always store extra dough, covered in a fridge that stays good for a day. This is especially good for dry places where roti gets hard quickly and only fresh roti stays soft. So make a large dough that'll suffice for the day. And make fresh roti at the time of lunch and dinner. Although, a bit too much work but absolutely worth it.
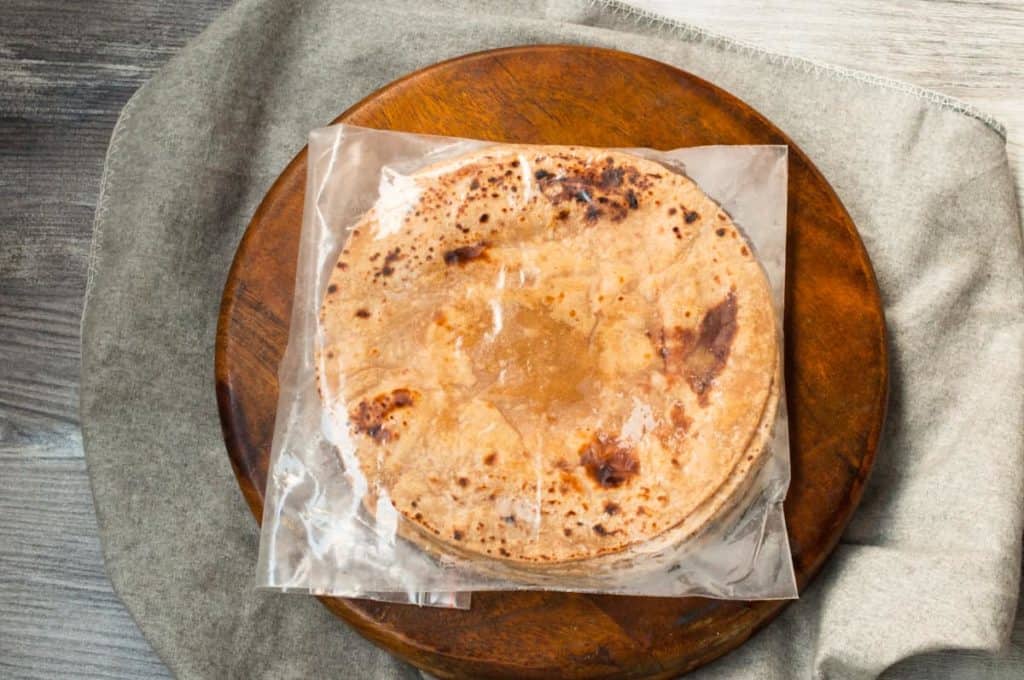
- Roti Freezing tips: Now, once you are done, count off all roti if you have more roti than you would need for the day's meal. Separate them and freeze them after 15 minutes or while still warm. Do not freeze hours later. Freezing warm roti will give you soft chapati after re-heating. Just put a pile of roti in zip-lock bags and freeze. When required, heat frozen roti directly on tawa. And you'll have almost fresh homemade roti. You can use frozen roti for up to 15 days.
How to make soft roti/ chapati?
Roti or Indian chapati making is an absolute art and the more precise and focused your personality is, it'll reflect in the outcome. There is some involvement of practicing fine motor skills too that's why roti-making is very good for anyone of any gender; especially kids.
Some people find it a very demanding task with a monotonous nature, but if you set an easier hour in the day to do this job it can be very relaxing.
Step to make the dough
Every cook practices for years to perfect roti-making art. You can't master it in a day but YOU CAN make edible roti on the first attempt. Read the steps thoroughly to understand the visual of making roti first time.
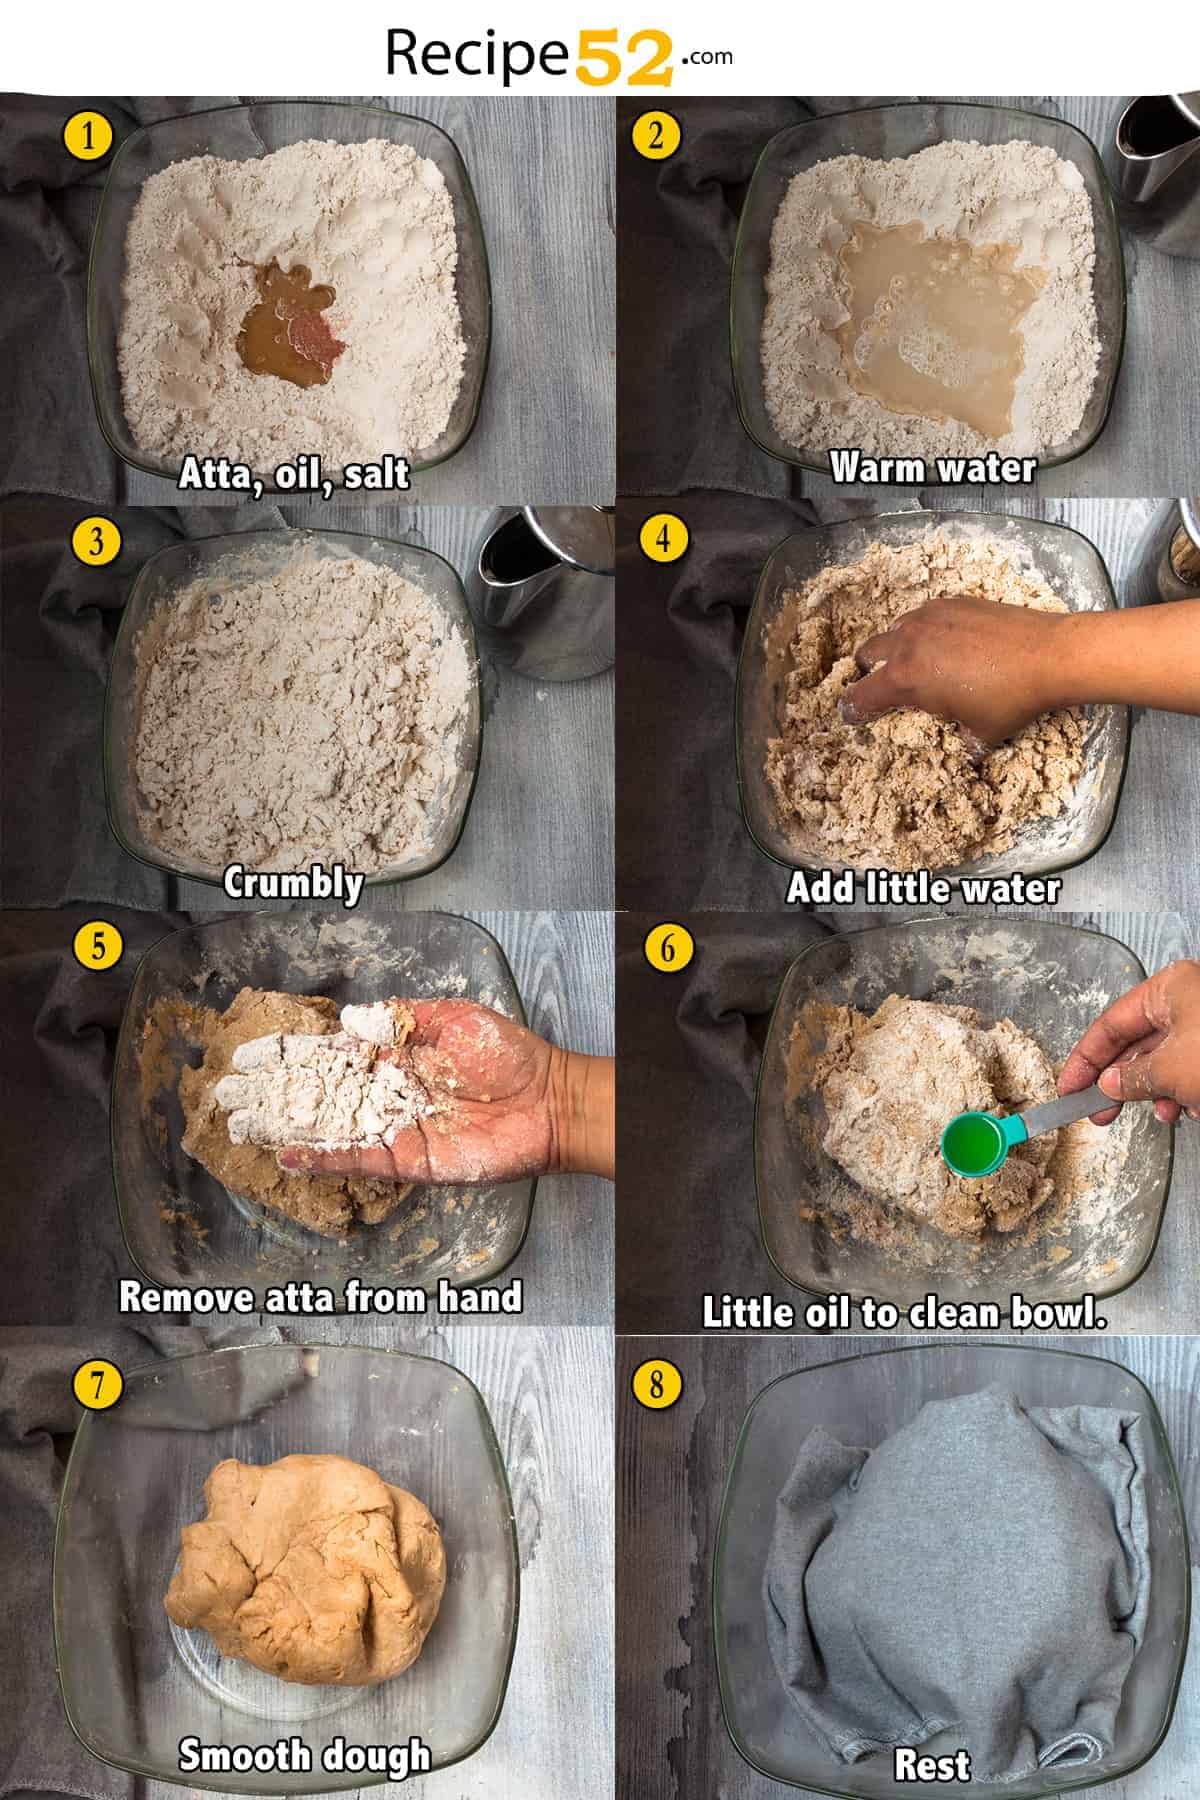
- In a large mixing bowl, take wheat flour and make a well in the flour. Add oil and salt.
- Add about ¾ cup warm water to make a dough. And mix lightly without applying any pressure. Protip: Mix lightly stirring with fingers.
- After mixing the flour will be crumbly.
- Add little water at a time and keep mixing the flour trying to bring it together in the dough. Protip: Do not apply too much pressure or the dough will be hard.
- Remove dough from your hand by rubbing little dry flour.
- Apply little oil on the sides of the bowl and on your hand. Bring all the flour together to form a ball. We need soft but nonsticky dough. (Add very little water at a time as needed.)
- Knead the dough for 1 minute. The dough will look rough at this stage.
- Rest the dough for 7-10 minutes and cover it with a cloth so the dough doesn't get dry.
Steps to knead the dough.
The right texture of flour is necessary for easy rolling and handling. Keep practicing and you'll know how to get it.
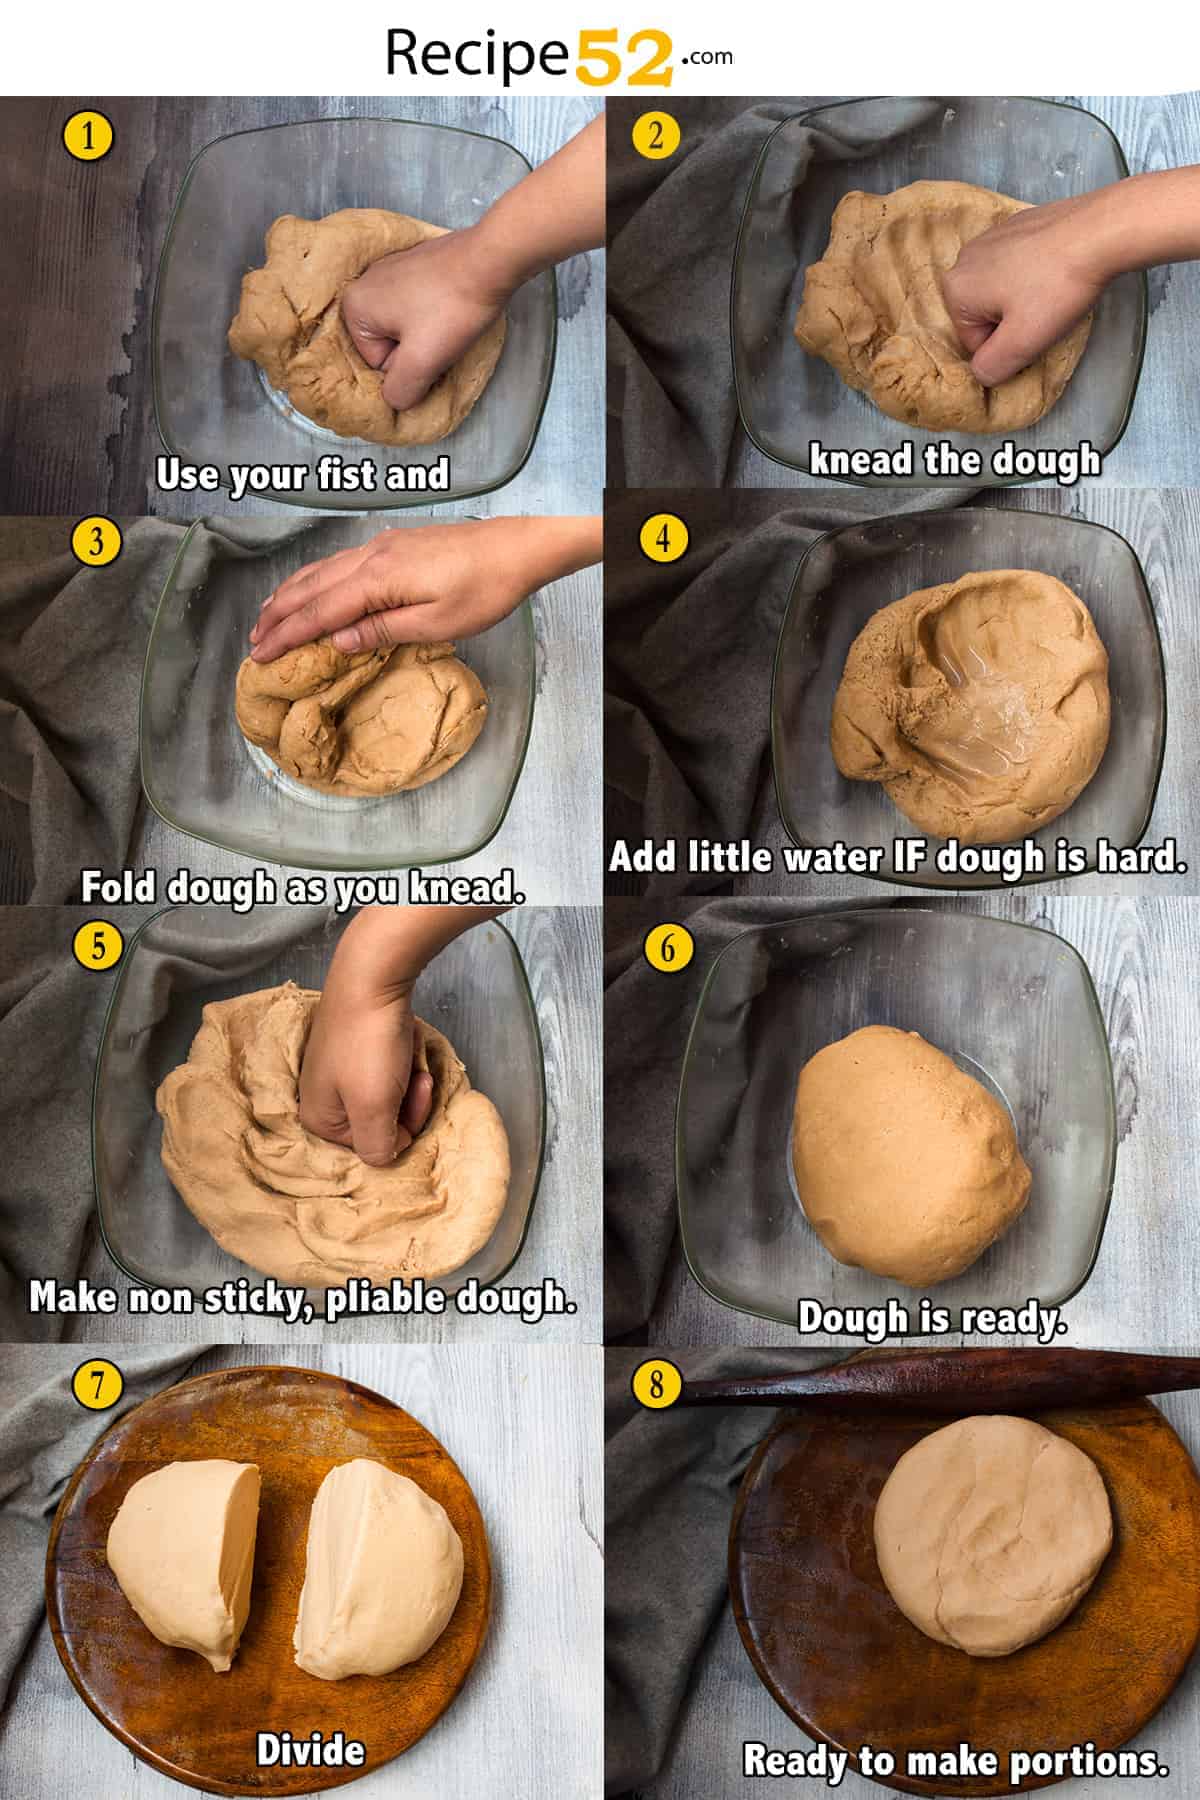
- Knead the dough by applying pressure with your fist.
- The dough will spread as you apply pressure.
- Fold the dough as you go and continue kneading for 1-2 minutes, the dough should be soft but not at all sticky and very pliable.
- IF, the dough seems hard at this stage, add a teaspoon of water as shown in step four in the center. Fold the flour and knead again until soft. ( Similarly, if the dough is too soft, you can add a little dry flour and knead again.
- Now, the dough is smooth and easy to work with.
- The dough is ready. Oil the rolling pin and board or the flat surface on which you intend to make roti.
- Divide the dough into two large parts.
- Make a big ball of each portion. With the help of a rolling pin make a circular flat shape.
Steps to make Roti / Chapati portions.
Perfectly round portions and equal portions are the foundation of round roti. Keep your foundation strong.
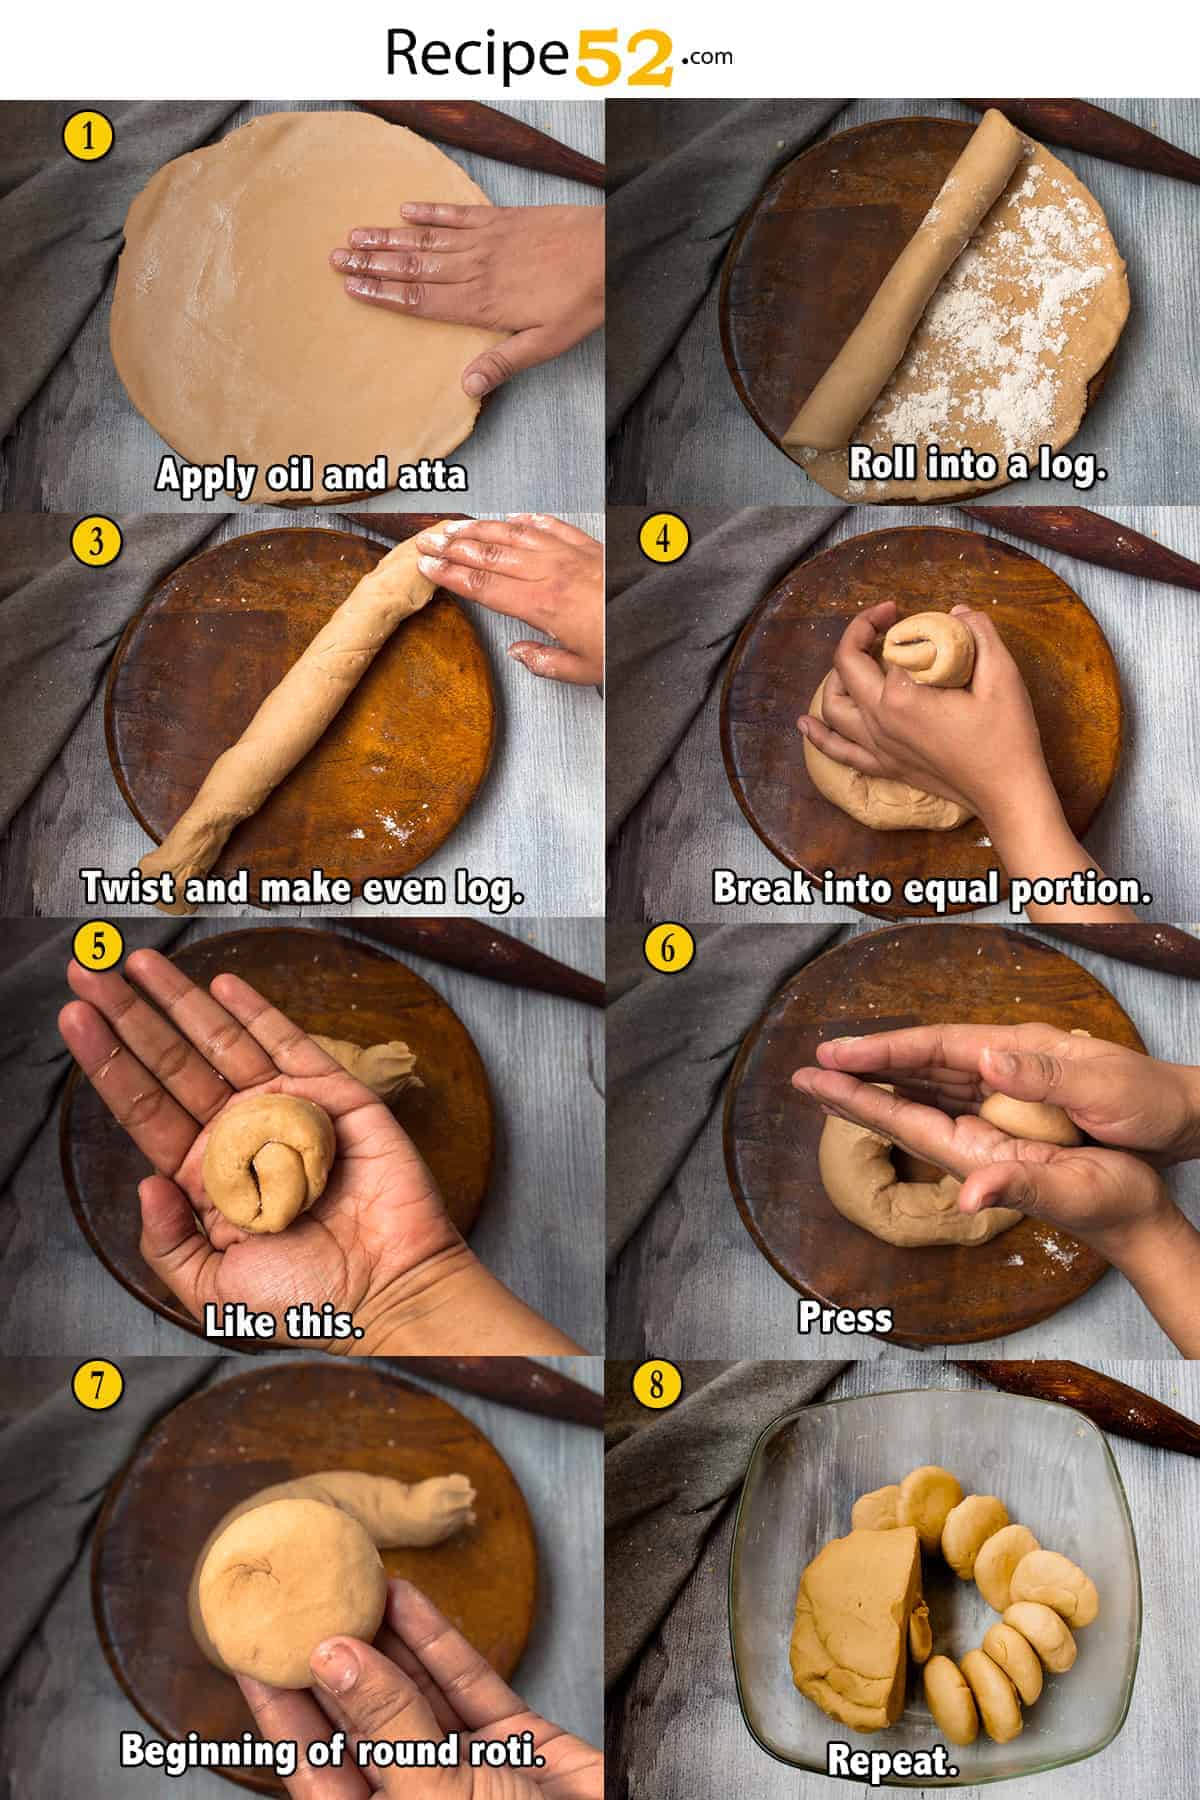
- Apply a little on the flat dough and dust it with whole wheat flour.
- Now roll the dough to make a log.
- The twist is a bit as you go and try to keep the width equal.
- Divide each roll into 9 equal portions. And break each portion as shown in the photo.
- That is what the portion will look like. Protip: You can make smaller portions for small and thin roti.
- Shape each portion by rolling a bit between palms.
- And then press the ball to make a flat circular disc. Protip: Do not roll too much or the sealed atta will come out.
- Repeat to make 9 roti portions. If you like small-sized roti make 12 portions. Protip: Make the portion from another ball after rolling the first 9 roti if you live in a cold, dry place.
Steps To roll and cook roti / chapati
While I'm trying my best to describe everything in great detail so even non-desi people can grasp it. This step requires practice. Do not worry if your roti is shapeless. It'll taste the same. Don't break your heart if your first doesn't fully puff up, few of them will puff up lightly for sure. If your roti tears or stick while rolling, make a ball of it and roll again. That roti will be slightly hard, but that's ok. It happens all the time.
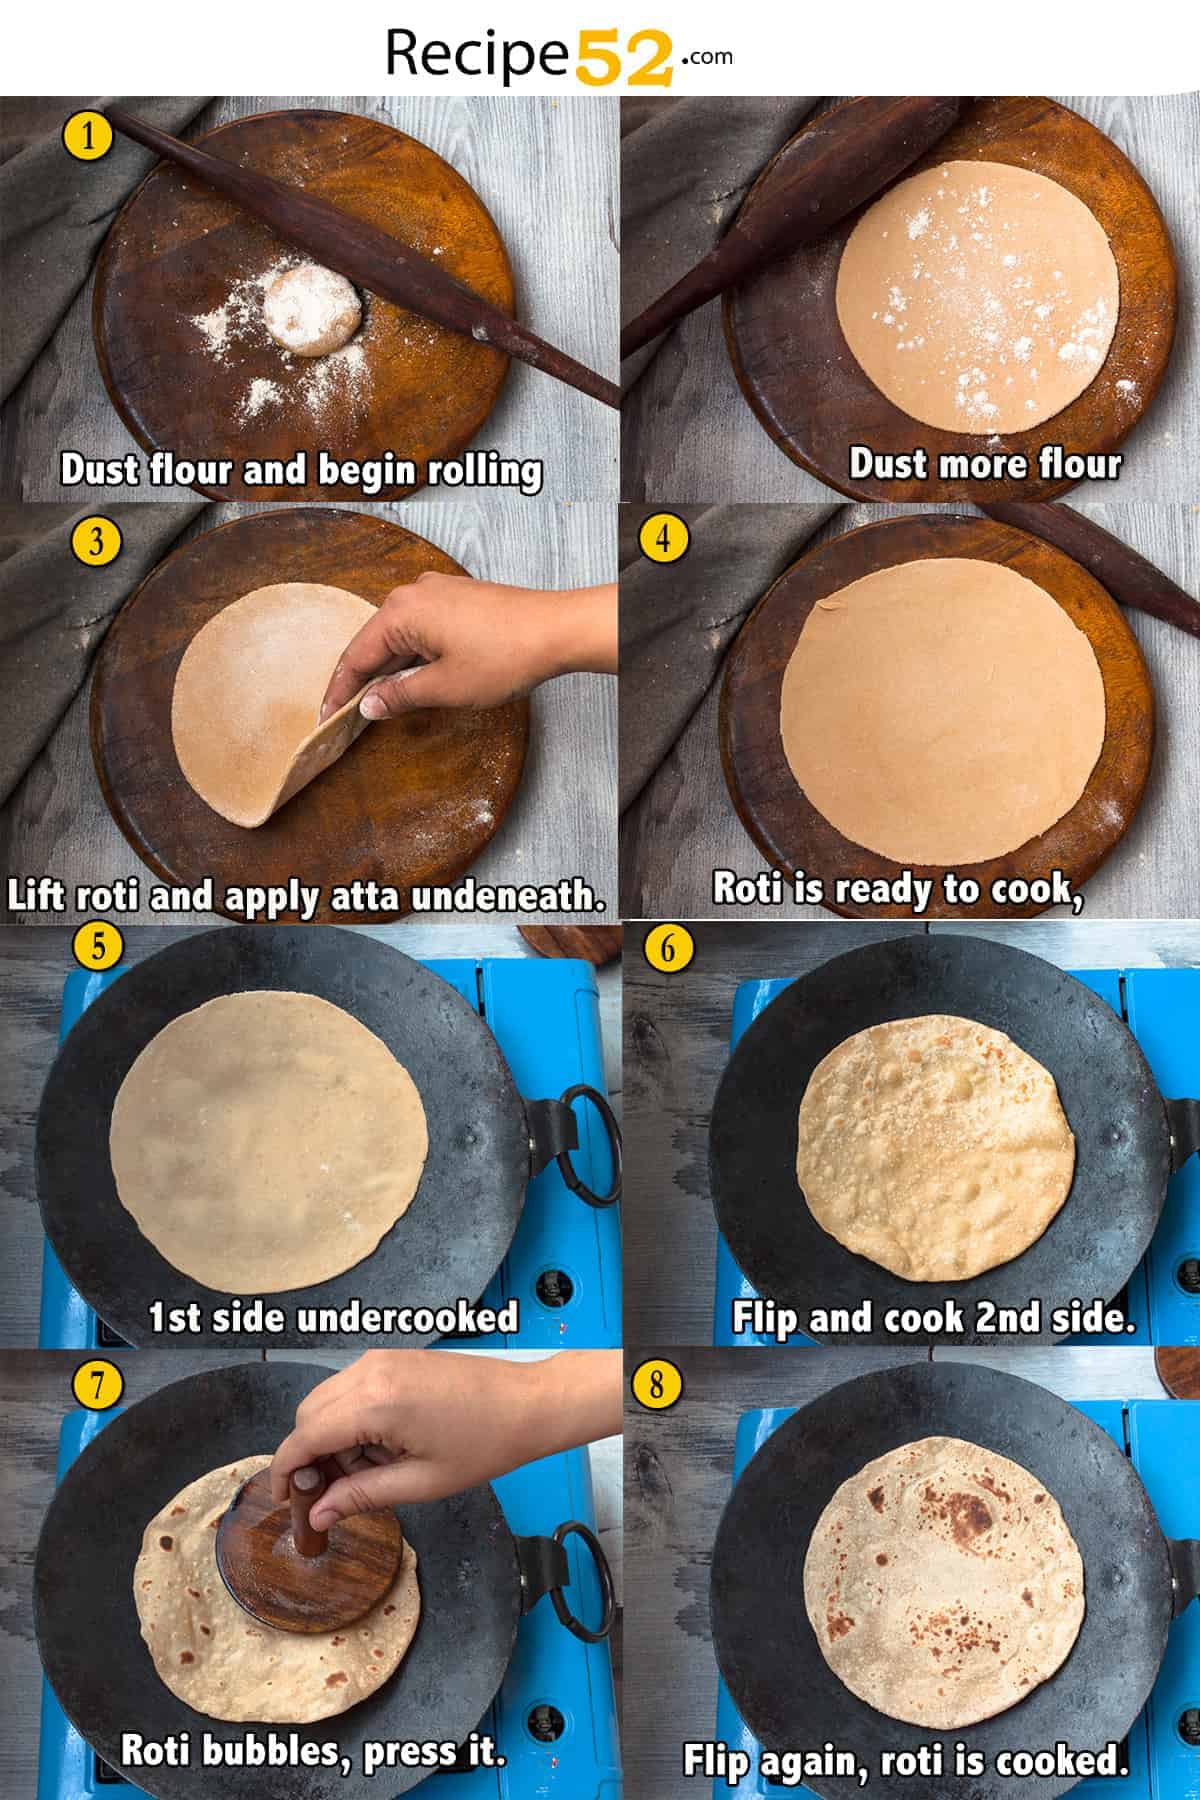
- Place the griddle on a medium flame for heating. Dust each circular disc with wheat flour, and make circular roti with a rolling pin.
- While rolling roti halfway, if usually need to dust it with more wheat flour.
- Lift roti and apply dusted wheat flour on the surface underneath. Then place the roti on the board again. Make sure the same surface is on the top. Protip: The action allows the even distribution of flour on all surfaces.
- Now, the roti won't stick and continue rolling until it reaches desired size and thickness. Protip: Usually, rolling roti and cooking is simultaneous action. But as a newbie, you can either ask someone else to cook while you roll chapti. Or work in batches, that is roll 6-5 roti and spread them on a tray. A little overlapping is ok. The rotis won't stick. Cook this roti, then roll another set of 5-6 roti and cook them.) You'll soon master enough to work simultaneously without burning roti.
- Place the roti on the hot girdle, and flip the roti after 3-4 sec. We want this 1st side to be undercooked. Cook on medium-high heat.
- Flip and cook the second side of the roti. Wait until it is fully cooked. Then flip. (Adjust heat as necessary.)
- Now, cook the first side of the roti completely until the color changes and see some brown spots. ( if you see black spots, reduce heat.)
- Transfer to the plate in the hot pot and smear a little on the top. Continue making roti and placing one on top of the other. Until you have a neat pile of roti. (For storing: See the tips section at the beginning of the post.)

FAQ
Use the following tips to keep your roti soft. 1. Use good quality flour. 2. Knead dough in warm water. 3. Make a soft and smooth dough. 4. Smear little oil on roti after cooking. 5. Store roti in an airtight container. Read the post carefully for more tips.
1. Bad flour, tough dough, cooking on very low heat, not kneading the dough properly, and not storing roti properly. Follow the complete recipe to avoid tough roti mistakes.
Add some flour and knead again until desired texture is reached.
Hungry for flatbread? Check these!
If you try this recipe, I'd LOVE to hear your feedback in the comments. Your 5-ratings motivate me to do my best. Stay connected for more recipes and videos on Facebook, Instagram, Pinterest and Youtube.
📖 Recipe
Soft Roti Recipe (with Secret Tips)
Ingredients
- 3 cups whole wheat flour/ gundum atta
- 3 tablespoon oil or ghee, divided, more apply on roti
- 1 teaspoon salt, or to taste
- 2 cup warm water, to knead or as needed
Instructions
- In a large mixing bowl take flour, 2 tbs oil and salt. Add gradually add ¾ cup and mix with fingers until crumbly.
- Gradually add more water and bring all flour together to make a dough. Add 1 teaspoon of oil on sides of bowl and knead the dough for 1-2 minutes until the dough holds together. Rest the dough for 7-10 minutes.
- After resting, knead again for 1-2 minute, the dough will be soft but not at all sticky and very pliable.
- Oil the rolling pin and board or the flat surface on which you intend to make roti.
- Divide dough two large portions. Make a big ball of each portion.
- Place the griddle on the medium flame for heating.
- From each ball with the help of rolling pin make a circular flat shape. Spread 1 teaspoon oil on it and dust it with whole wheat flour. Now roll the dough to form a log.
- Divide each log in 9 equal portion. Shape each portion in a round ball and then press the ball to make a flat circular disc.
- Dust each circular disc with wheat flour, and make circular roti with rolling pin. Use wheat flour to dust as required.
- Place the roti on hot girdle, flip the roti after 3-4 sec while still undercooked. The other side of roti has to be fully cooked before flipping to the first side. Now, cook the first side of roti completely
- .Take 1 teaspoon oil and smear on of roti after taking it off from griddle/tawa. Follow same instruction with all chapati roti and pile up roti one on top of other. When all rotis are cooked store in a hot pot or in aluminium foil.
- Soft chapati /roti is ready to serve.





Jumana says
Useful tips .. would like to share one... while freezing rotis ..better not to apply ghee/ oil..let it go in freezer when warm once out on tawa you put ghee
Recipe 52 says
Great tip. Thank you so much for feedback.:)
VAISHALI says
very nice tips given...thanks a lot
Recipe 52 says
Thanks for the feedback. ???
Recipe 52 says
I know the difference, but can’t afford an editor to check my content.
Suraya Ahmed says
Thankyou so much for the very useful tips. Will definitely give it a try. Allah bless u for sharing
Recipe 52 says
Dear, you made my day with your kind words.
Anonymous says
Thanks a lot for such useful tips, seemingly a very casual task but of course roti making is an art otherwise one may not enjoy the food without that 'perfect roti'
Recipe 52 says
So true! Thanks for the feedback.???
Jason Smith says
Thanks for showing the tips for preparing a proper roti
Recipe 52 says
Thank you for stopping by and sharing feedback. ?
Rashida Chopra says
Thanks for information
Anonymous says
Bestest tips! Gonna try these out and report back on my results! You have a new follower
Recipe 52 says
Thanks for the feedback. Welcome on board.?
randomramblerrblog says
Wow these are so useful. Definitely going to try them out.
Mariam Sodawater says
Thank you. ???I'm you found them useful.
mehreenfarhan says
This is so helpful, like, seriously!
Mariam Sodawater says
Thanks dear, ???
Tabarka Rajab says
I didn't know that too much information really?
Mariam Sodawater says
Thank you. ???
Mariam Sodawater says
Thank you so much dear.!
Rashida Goryawala says
A super useful post! Thank you so much for the tips!
Mariam Sodawater says
Thank you Rashida, comments like yours keeps me going. ??